Step 1: New Account Creation
If you already have an account, skip step 1.
Go to https://analytics.google.com/ and
sign in with your Google Account.
Select “Start Measuring”.
1. Account Setup: Name your account. We suggest simply putting in the name of your organization.
Click NEXT.
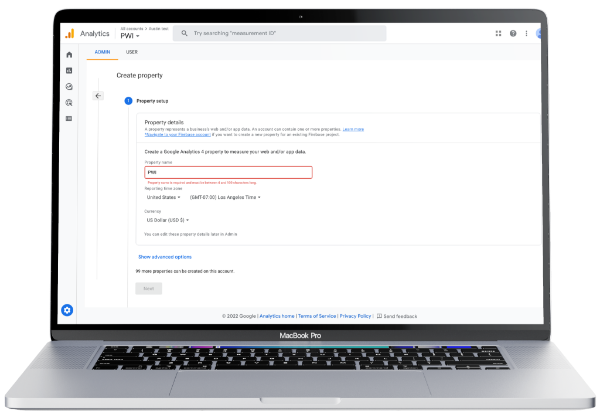
2. Property Setup: Insert a property name.
You can again simply put your organization’s name.
3. About your business: Answer the basic organization questions and select all applicable checkbox items for how Google Analytics is intended to be utilized.
Click CREATE.
3. Accept the Google Analytics Terms of Service Agreement.
Step 2: Link Your Website
1. Data Stream: Upon accepting the terms, you should be taken directly to the Data Stream section. If not, follow steps to get there below.
a. Click on the gear symbol in the bottom left corner of your Analytics account to view the Admin settings.
b. Click data streams under the Property settings.
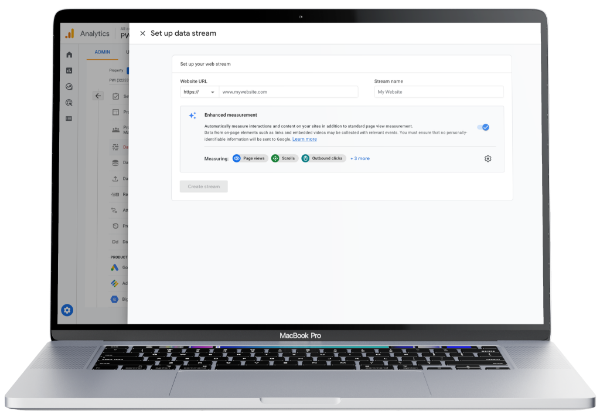
2. Select Web and enter your organization’s web domain and stream name. Ensure ‘Enhanced measurement’ is on and select Create Stream.
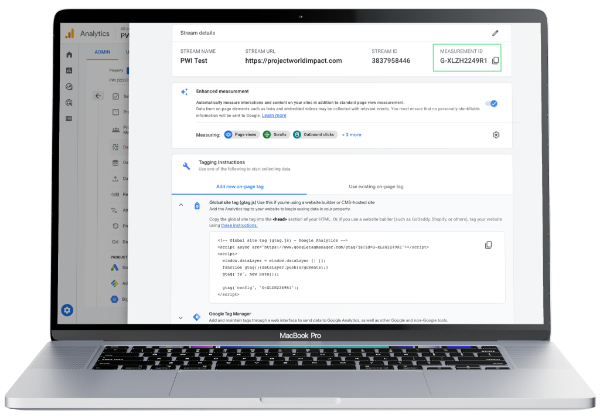
3. Copy or save your measurement ID, you’ll need this in the next step. G-XLZH2249R1 is an example of a measurement ID.
Step 3: Tracking
1. In order for your Google Analytics to track data, you need to integrate a tracking code/ID in your website backend. If you are utilizing WordPress, Wix, Weebly, or SquareSpace, it’s best to utilize Google Tag Manager (GTM) and the plugins available to you that will handle code integration. Click here for instructions on setting up your Google Tag Manager container.
a. You can confirm the code is integrated correctly by using Google Tag Assistant Legacy.
2. Once your GTM container is set up and tracking, visit your container workspace. Select ‘Create New Tag’.
3. Next, select ‘Tag Configuration’ followed by ‘Google Analytics: GA4 Configuration’. Enter the measurement ID from the step prior.
4.Triggering: Select triggering followed by ‘All Pages’ once redirected.
5. Finally, hit save in the upper right hand corner. Your GA4 property will start tracking but may take 24 hours to finalize.
Step 4: Access
1. Log into https://analytics.google.com/.
2. Click on the gear symbol in the bottom left corner to view your Admin settings.
3. Click on the Account Access Management button in the first column.
4. Click on the plus symbol in the upper right corner of the screen.
5. Select Add Users.
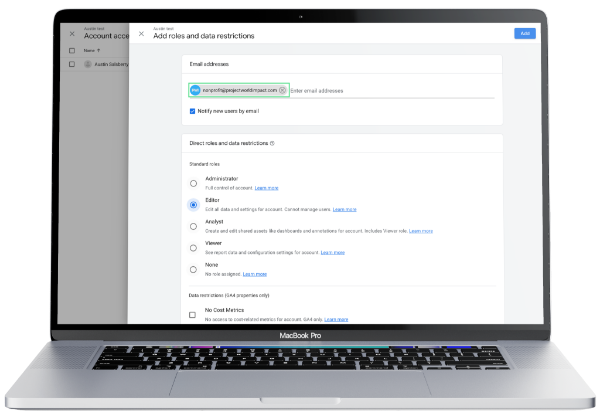
6. In the section that says “enter email addresses” enter nonprofit@projectworldimpact.com.
7. Select the boxes next to Edit, Collaborate, and Read & Analyze. We do not need the Manage Users permission.
8. Click Add. Feel free to email nonprofit@projectworldimpact.com if you have any questions. Thanks!

Download Guide to Google Analytics PDF
We sincerely hope this helps you start to understand Google Analytics. Any more in-depth questions in regards to your Analytics account should be directed to Google Analytics support. You are welcome to reach out to nonprofit@projectworldimpact.com with any general questions and we will be happy to help where we can.